Overview
This document provides an introduction to Eclipse, the integrated development environment (IDE) that can used to write Java programs (and also programs in many other languages). Eclipse is an open-source, professional IDE that is popular in industry. Eclipse has many features and tools to support software development. Eclipse is pre-installed on the CS lab machines and can be found under the Applications tab in the Finder. Alternatively, you can download Eclipse if you would like.
Creating a Workspace
The workspace folder is a folder that Eclipse defaults to in order to load and store projects that you create. Of course you can load and store projects from outside of the workspace folder, but Eclipse will default to the workspace. When you first install Eclipse, you will be prompted to choose a workspace. Also, you can switch workspaces at any time by selecting File -> Switch Workspace.
Starting Eclipse
From your computer
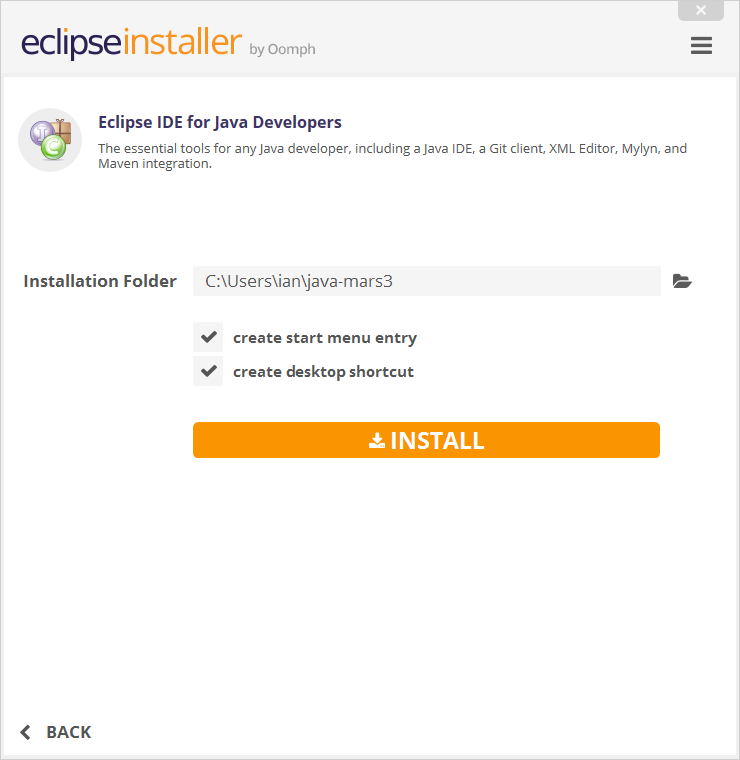
If you are using your own computer, navigate to where you installed Eclipse and then open it.
From the CS Lab environment
If you are using a lab computer, open the Finder, which can be found by moving your cursor to the middle of the bottom edge of the screen to open the dock, and then clicking on the Finder icon. You can see an example dock below; the Finder icon is on the far left.

Once you have opened the Finder, click on Applications on the left side of the window. In that folder, find the Eclipse icon and open it.
Workspace
After starting, Eclipse will prompt you for a workspace location. An Eclipse workspace is simply a folder that you designate where Eclipse will store the projects you create. While you are able to load and save projects in any folder that you want, even outside of the workspace folder, the workspace folder is the default location for new projects and it is good practice to keep your projects in the workspace folder.
macOS
You can select a new workspace location with the Browse button, and then navigate to the folder that you created earlier. Make sure you remember this location, as you will need to navigate to it when turning in your files. Click OK to continue.
Workbenches and Perspectives
The Eclipse Workbench is the part of Eclipse that manages the user interface. In Eclipse, a perspective is simply a pre-defined arrangement of user interface panels that provide the developer with information related to the project they are working on. For example, the information that a Java programmer would want to see is different than the information that a web developer will want to see and so there are different perspectives for each type of project. This tutorial assumes that we will be using Eclipse for writing Java programs.
Workbench
The first time you open Eclipse, you will be greeted by the Welcome screen. Click on the Workbench arrow in the top right corner of the screen, as highlighted below:

You should now be in the Eclipse workbench. By default, the workbench will show the Java perspective and appear similar to the image below; this is the primary perspective you will use when developing Java programs. In Eclipse, a perspective is simply a pre-defined arrangement of panels that provide the developer with information related to the project they are working on. Since we plan on writing Java programs, we would like to see the Java perspective. The image below identifies two of the panels you will regularly interact with:

If your perspective does not look like this, you can reset it by:
- Going to the menu bar (which is along the top of the screen on a Mac) and select Window → Perspective → Open Perspective → Other.
- Double-clicking on Java Default.
- Returning to the menu bar and select Window → Perspective → Reset Perspective, then click Yes.
Creating a new Project
Your Eclipse project is where all your files will be stored. Usually, this will just be Java classes (.java files), which go in the src (short for source) folder.
Go to the menu bar and select File → New → Java Project. The only option you should fill in is the first box, entitled Project Name. Project names can be whatever you like, but they should be descriptive. You can see an example project creation window below. When you have entered the Project Name, click Finish. Other project types are supported and can be used if you are not writing a Java program. Just select the correct type for the project that you want to create.

You will then return to the workbench, with your project appearing on the top-left panel. Click the triangle next to your project name to expand it, as shown below:

Creating a Class
In Java, a program consists of one or more classes. This section describes how to create a new Java class.
To create a new class file to store your code. Go to the menu bar and select File → New → Class. There will be two options you need to handle. The first is the Name box, about a third of the way down the window. Here, you will give the name of the class you are creating: note that in Java, the names of classes should be capitalized and not all-caps. Second, check the box about two-thirds of the way down the window that is labeled public static void main(String[] args). While not necessary, selecting this option will automatically generate some code for you, specifically the main method, thus saving you a bit of time. Also, although using the default package is discouraged, you can ignore the warning message at the top of the "new class" window. You can see an example of class creation below. When you are done, click Finish.

Eclipse will create the class and then return to the workbench, with your new class appearing in the src folder on the left-hand panel, and the new class automatically opened in the center panel. Notice that there is already some code in the file; this is the result of the checkbox you selected when creating your class. You can see an example workspace below.

Editing a Class
Eclipse uses a smart text editor which means that the text editor understands Java and will provide assistance when you are editing your Java code. This section briefly describes several features of the Eclipse editor.
Highlighting
When typing into the Eclipse editor, the editor will color text in a specific way and also highlight syntax errors using red underlining. It will also flag the error on the left-hand size of the editor as well. Consider the screenshot below.

In this figure, the class name HelloWorld is highlighted in blue as is the phrase "String[] args". The phrases "public class" and "public static void" are highlighted in orange while the word main is highlighted in green. Once you gain experience with Java, you will learn that HelloWorld is the name of a class, the orange words are "keywords" that have a pre-defined meaning in the language and the word "main" is the name of a function.
Also note that two words are underlined in red: Hello and World; this denotes an error in the program. If you would like Eclipse to explain the error, you can hover the cursor over the error and, after a second or two delay, a description of the error will pop up on the screen.
For beginning students, these errors are very difficult to understand since they tend to be overly technical. In the above example, the System.out.println function should be printing a string (i.e. the text Hello World should be enclosed in double quotes) but the double quotes have been omitted and hence the Java compiler thinks that the println function is operating on two variables: Hello and World. But there are no variables by that name in the program and println only ever operates on a single input.
Auto Suggestion
Sometimes, Eclipse will suggest what to type next if there are a limited number of options for what could come next. You will only see this behavior when you type a period (.) character following an object variable or class name. In the example below, we have just typed in "System.out." (notice the last period) and, after a brief moments delay, Eclipse displayed a pop-up window listing everything that could possibly be typed in next. This list of options is referred to as an "automatic suggestion" or "auto-suggest" or "auto-complete".

Running a Program
A Java program consists of a Java source file. If this file contains a public static void main(String[] args) method then it can be run as a Java application.
Once you believe you have entered your program correctly and there are no errors indicated in the editor (preferably no warnings either), save your file (File → Save), and press the green Run button, highlighted in the image below.

At the bottom of your Eclipse window, you should see a Console tab, which should display the output of your program. In the example program above, the program outputs (prints) the phrase Hello World.